This article is part of a Cookiecutter series - previously, we posted about standardizing project templates using Cookiecutter & how to create a SpringBoot microservice and a Python + Django microservice.
With all the data being produced by business today, data science has become more prevalent across most engineering organizations. It’s used in product analytics, search, website recommendations, and of course, to target ads to users who may think that their phones may be listening to them. It’s also used in fraud and risk detection, as well as in the public sector.
One recent example is the UK government, who is using data science to provide a trusted, joined-up, and personalized service for the users of gov.uk. They laid out their goals for the year and the plan to achieve them in this blog post. As part of this effort, they also created a Cookiecutter template to help them standardize new data science projects. This template will be the focus of our blog post today.
Getting started
1. If you don’t already have Cookiecutter, install the CLI on your local setup. Follow the latest installation instructions. If you’ve read our other tutorials, you can skip this section.
2. Create a new folder on your local setup with this command:
mkdir TestDataScienceProject && cd TestDataScienceProject
3. Clone the template into your newly created folder with this command:
git clone https://github.com/best-practice-and-impact/govcookiecutter.git
We’ve gone over the tree structure of a typical Cookiecutter template in previous posts - today’s example is consistent with what we’ve seen before. The central file of any Cookiecutter template is the cookiecutter.json file. In this particular example, you’ll see a parameter for the project name and repo name, a choice for which platform where you’ll host your repo, and whether or not you want your project to include support for R.
Once you run Cookiecutter and enter the inputs as prompted, any places where you see {{ cookiecutter.[param-name] }} will be replaced with the values you entered.
Creating the Data Science Project
1. From the TestDataScienceProject folder, run:
cookiecutter govcookiecutter
2. You’ll now be prompted to fill out the inputs we mentioned above. To use the defaults, just press Enter.
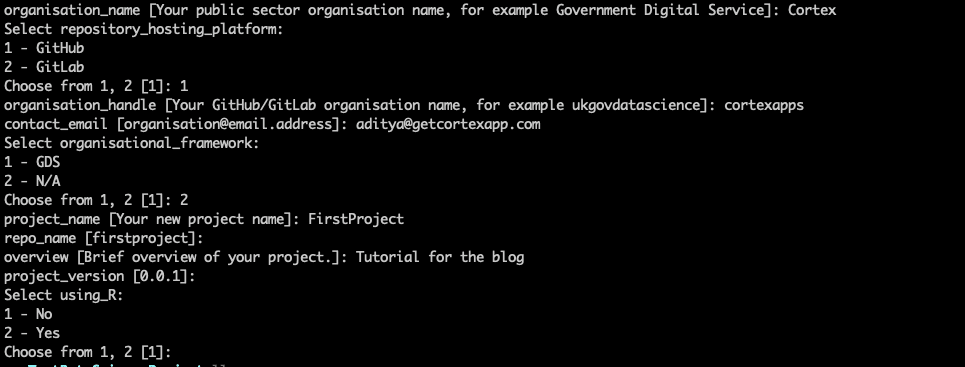
As you can see, this template provides many configuration options, language choices, and even CI platform choices (Github, Gitlab)
3. Once the above command is run, you’ll see a new directory titled with whatever you entered for the reponame field. In our case, this is firstproject.
4. cd into the newly created folder, and you’ll see a base project ready for use! After running the ls command, you’d notice a few base directories:
Docs: A base docs set up ready for your Python project
Data: A folder to store all your datasets.
Notebooks: A dedicated folder to hold your Jupyter notebooks and accompanying utils.
Src: A source directory to hold your Python source code that you can use after you’re done with the notebooks
Tests: A directory to store all the test suites for the code written in the src directory.
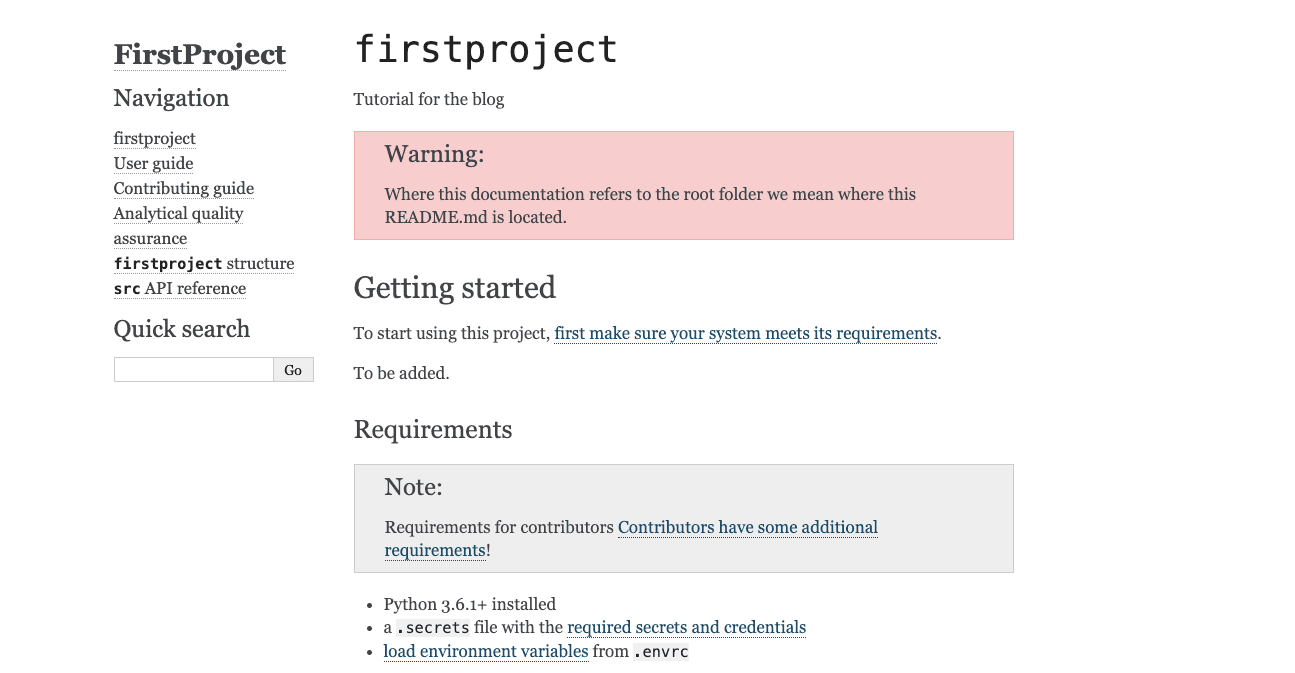
5. If you already have Python 3 installed, run make docs in the folder. You should see a message like this:
 This will generate the base set of docs and you should see a page like this:
6. In this project, we are also getting our first introduction to automatically generated input fields by CookieCutter. Looking at the cookiecutter.json, The “repo_name” parameter is automatically derived from the project name that we filled in when we ran cookiecutter! This means that you can automate standard values for even the inputs! You can always override the values during project creation if you need, but automatically generating values lets you define standards and reduces friction for users.
Hooks
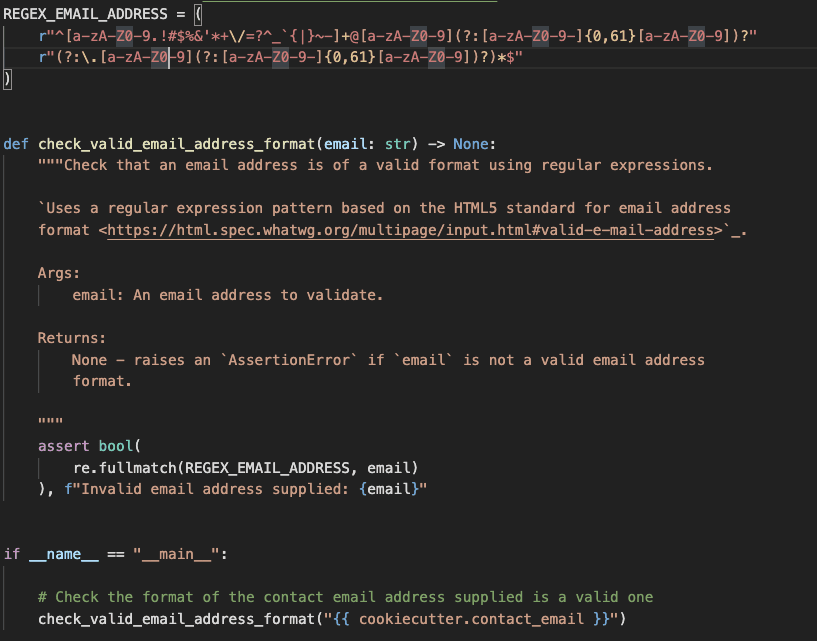
In this template, we’re also introduced to using hooks using CookieCutter! If you look at the template hooks/pre_gen_project.py file, you’d notice a function invocation (screenshot below) that verifies that the email address you entered as contact_email in the above parameters is a valid email.
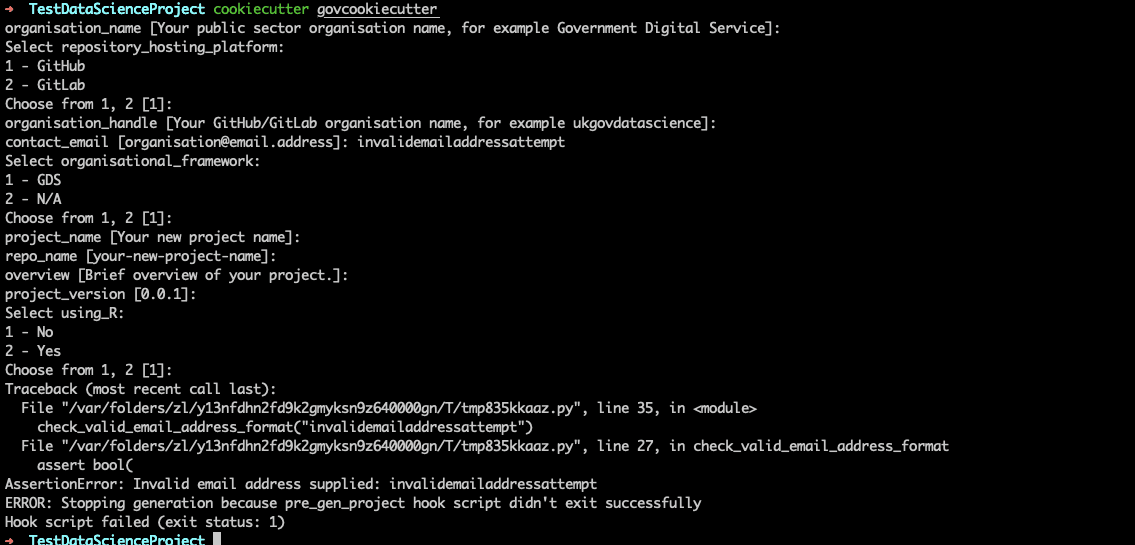
If you try creating a new project with the same template but enter an incorrect email address, you’d notice a failure message that asks you to re-enter a valid email address!
Voila!! Congratulations on creating a base setup for your new data science project! As we can see, using a template like this ensures that all teams in your organization follow the standardized folder structure and best practices. We also saw the power of CookieCutter hooks that can be used to run Python code on our templates pre & post project generation. Subscribe to our blog to learn more about Cookiecutter & microservices.


